Everyone with a WordPress site needs to prioritize security. Without an SSL certificate, browsers flag your site as “Not Secure,” and many visitors will bounce before they ever read your content or complete a purchase.
It’s the difference between your site URL beginning with HTTP vs. HTTPS—the extra “S” signals that traffic is encrypted end-to-end using TLS (the modern form of SSL). A simple way to remember it: S = secure.
Adding SSL and HTTPS to your WordPress site proves to users (and their browsers) that the connection is encrypted and hasn’t been tampered with by intermediaries. That trust unlocks the page in modern browsers instead of showing scary warnings.
Visitors can browse, shop, and enter personal details with confidence, and you’ll see fewer bounces and abandoned carts caused by security warnings.
In 2025, HTTPS is the bare minimum. The only way to get it is by installing a valid SSL/TLS certificate and forcing all traffic to use HTTPS.
If this is your first time getting and installing an SSL certificate, it can feel intimidating. Use this guide to go from HTTP to HTTPS the right way—without breaking your site.
5 Steps to Add SSL and HTTPS in WordPress
I’ve owned and managed many WordPress sites. Here’s the simplest, most reliable five-step workflow:
- Determine What Type of SSL Certificate You Need
- Get an SSL Certificate
- Install the SSL Certificate
- Verify the Installation
- Notify Google
The Good
For most WordPress sites, SSL is free. Nearly all reputable hosts include auto-renewing certificates (usually via Let’s Encrypt or a similar provider) with every plan. Even when you need a specialty certificate, the typical paid range of $50–$200 per year is small compared to the trust and conversions you gain.
WordPress itself is free, so between WordPress and a host-provided SSL, many site owners pay $0 to get HTTPS live.
The real upside starts after installation: less friction for users, stronger trust signals, eligibility for modern browser features, and a small SEO boost. Search engines prefer secure sites, and browsers like Chrome, Firefox, and Safari actively warn users away from non-HTTPS pages.
If you accept payments or plan to, SSL/TLS is non-negotiable. It’s also table stakes for any site handling logins or sensitive form data. With HTTPS in place, you can confidently expand into ecommerce, memberships, and other revenue streams.
The Bad
The main hurdle is the setup. SSL doesn’t come from WordPress itself—you obtain it through your host or a certificate authority and then enable it on your domain.
First-time WordPress users may find the interface confusing, and the process can involve a few moving parts: enabling the cert at your host, forcing HTTPS, updating WordPress URLs, and fixing any lingering “mixed content.”
Also remember: SSL only encrypts traffic between browser and server. You still need secure hosting, strong passwords, 2FA, regular updates, backups, and a security plugin to reduce other risks that SSL alone can’t cover.
Finally, the install doesn’t always propagate instantly. You’ll need to verify it’s live everywhere and resolve any non-HTTPS assets your pages still reference.
Step 1 – Determine What Type of SSL Certificate You Need
SSL isn’t one-size-fits-all. There are several types, which vary by how your identity is validated and by how many domains or subdomains the certificate covers.
Broadly, there are two dimensions to consider: validation level and the scope of domains the certificate secures.
Here’s how they work.
Validation Level SSL Certificates
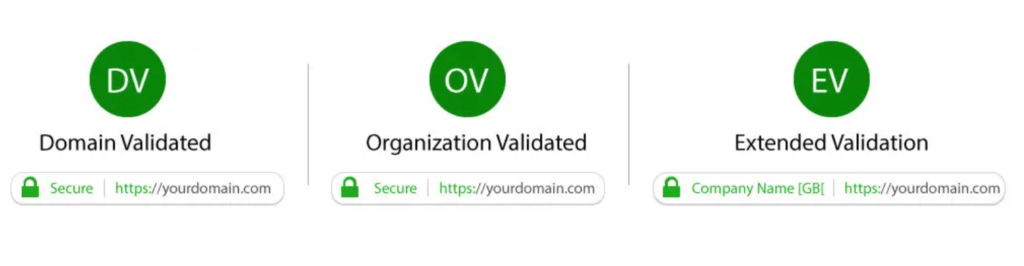
There are three common validation levels—domain validated (DV), organization validated (OV), and extended validation (EV). The difference is the identity checks, not the strength of encryption (all modern certificates use strong TLS).
What each level means:
- Domain Validated (DV) SSL — Fastest to obtain and ideal for most blogs, portfolios, small business sites, and stores. You prove control of the domain (e.g., via email or DNS). Encryption is just as strong as OV/EV.
- Organization Validated (OV) SSL — Adds light business identity checks (the certificate lists your organization details). Useful for companies that want additional assurance signals in the certificate details.
- Extended Validation (EV) SSL — Involves the most rigorous vetting. Historically showed a distinct browser UI, but modern browsers no longer display company names in the address bar. EV is now primarily about higher assurance for high-risk use cases.
All three enable HTTPS in WordPress. Choose the lowest level that meets your compliance and stakeholder needs—DV is sufficient for most sites.
Secured Domains
Validation level doesn’t determine how many hostnames your certificate protects. Scope does. Decide whether you need to secure a single hostname, many subdomains, or multiple different domains.
Single-domain SSL protects one fully qualified domain name (FQDN), such as www.example.com. It won’t cover blog.example.com unless that’s explicitly included.
Wildcard SSL secures an entire level of subdomains on one domain (e.g., *.example.com covers www, blog, shop, etc.).
Multi-domain (SAN/UCC) SSL covers different hostnames—even across different domains—under one certificate. Handy if you manage multiple sites and prefer a single renewal.
Step 2 – Get an SSL Certificate
Once you know the type you need, obtain the certificate. You can get SSL from:
- Web Hosting Providers
- Certificate Authorities (CA)
- Website Builders
For most WordPress sites, your hosting provider is the easiest and best source. Here’s why—and what to consider in each scenario.
How to Get an SSL From a Hosting Provider
The best web hosting providers for WordPress include free, auto-renewing SSL certificates. If you’re already hosted, check your dashboard—you may just need to toggle it on.
If your host doesn’t provide free SSL in 2025, that’s a red flag. Consider moving to a reputable provider that includes it and makes HTTPS setup straightforward.
Bluehost is a solid, beginner-friendly option with WordPress-specific and managed plans that make enabling SSL simple. In the next step, you’ll see how easy installation and management can be with a host like this.
During checkout, most hosts automatically include a free Let’s Encrypt SSL with your plan.
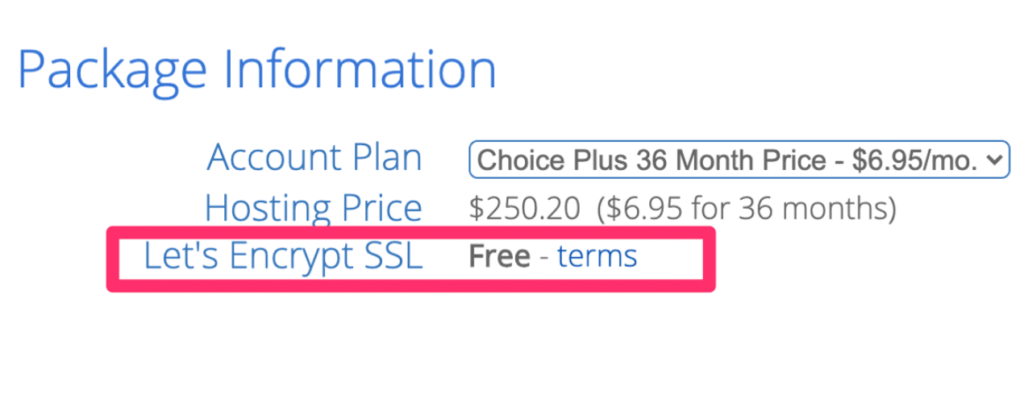
Other top hosts offer the same convenience, but we’ll stick with Bluehost for the walkthrough below.
How to Get SSL From a Certificate Authority (CA)
You can buy directly from a certificate authority if you need a wildcard, multi-domain, OV, or EV certificate. Popular options include:
This route costs more and requires a bit more setup on your server, but it’s the right choice for specific compliance or multi-site needs.
For most sites, a free host-provided DV certificate is perfectly adequate.
How to Get SSL From a Website Builder
Website builders like Wix and Squarespace bundle SSL with their platforms, but those certificates can’t be moved to WordPress. If you’re on WordPress, get SSL from your host or a CA instead.
Step 3 – Install the SSL Certificate
Once you have an SSL, enable it for your domain. The specifics vary by host. Here’s how it works in Bluehost (other hosts use similar steps):
The exact labels may differ, but the overall flow is consistent across major providers.
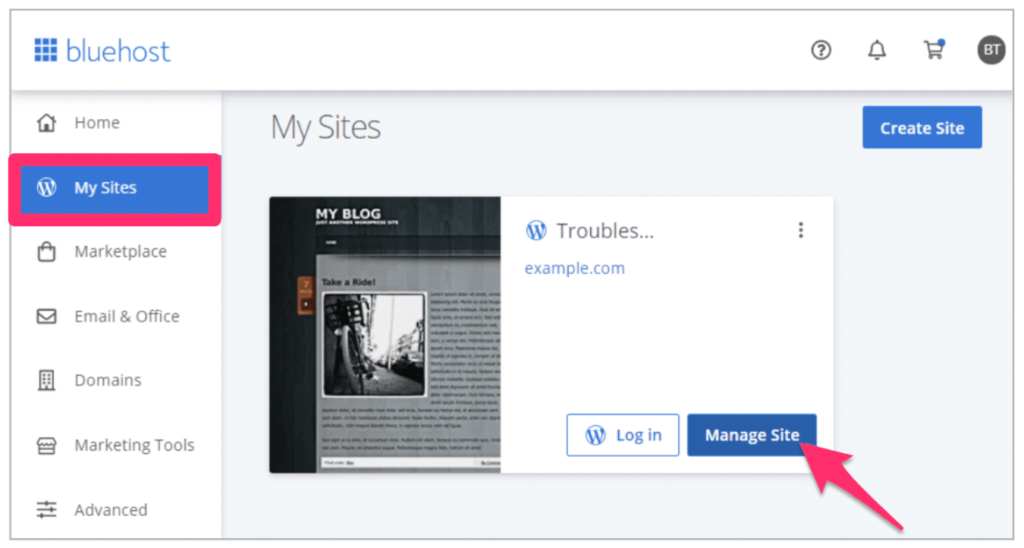
Go to Your Bluehost Dashboard
In your dashboard, click “My Sites,” find the site you want, and choose “Manage Site.”
Enable the Certificate
Open the Security tab and find the “Security Certificate” area. Ensure the SSL is enabled for your domain and let it provision.
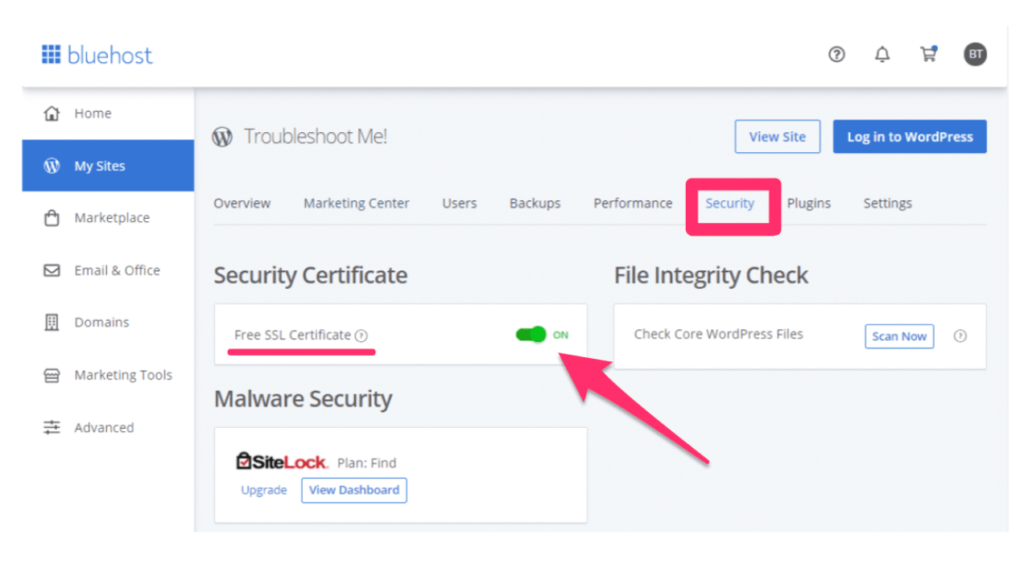
Next, force HTTPS site-wide so every URL redirects from HTTP to HTTPS. Many hosts have a one-click toggle. If yours doesn’t, you can handle it with your host’s tools or a reputable plugin. While you’re at it, update your WordPress Address (URL) and Site Address (URL) in Settings > General to use https://.
If you use a CDN or reverse proxy, enable HTTPS there as well and clear all caches to avoid mixed content from cached assets.
Step 4 – Verify the Installation
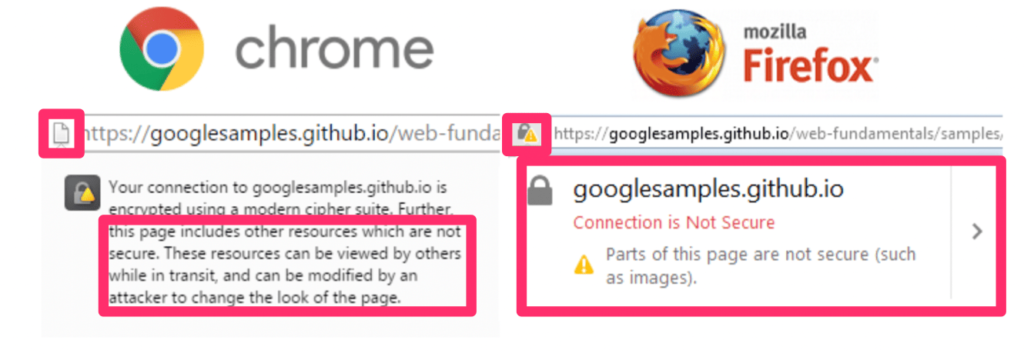
Provisioning can take a short time. If your site still shows “Not Secure,” wait a bit and check again. Then verify everything is served via https:// and that the padlock appears consistently across your pages.
Test several pages and click the padlock to view connection details. If you see warnings, you may have a mixed content error, which happens when a page loads images, scripts, or styles over HTTP.
Fix it by updating hard-coded http:// URLs in your theme, plugins, database, and CDN to https://. Many users handle this with a security/SSL helper plugin and a one-time search-and-replace. Then purge caches and retest.
These issues are less common with host-managed installs, but manual setups can surface leftovers—work through them methodically until every request is HTTPS.
Step 5 – Notify Google
Don’t wait for Google to discover the change—be proactive. In Google Search Console, add or verify your HTTPS property (or use a Domain property that covers both HTTP and HTTPS), and submit a sitemap that lists your new HTTPS URLs.
Update internal links, canonical tags, hreflang, and open-graph tags to HTTPS so Google sees a consistent, secure version everywhere. If you use analytics, confirm your property/streams are logging the HTTPS URLs correctly.
Rankings can dip briefly during the switch. After re-indexing, most sites recover and benefit from the trust and performance wins that come with HTTPS.